Back in mid may Ashley & Darryl Burrell (The ABTEC Brothers) flew all the way over to the US of A to meet and learn a few things off the Digital Designs crew. While over there Darryl spent a day learning all about building and repairing Digital Designs Sub-Woofers, in the process taking photos and videos until his battery on his camera couldn’t take it any more!
This blog isn’t so much about the trip to the States but how we at ABTEC are now doing Digital Designs Sub-Woofer re-coning and repairs. If you are interested in reading about the ABTEC Brothers flight to the US of A visiting Digital Designs CLICK HERE.
A good customer & friend had a well used Digital Designs DD-1515-D2 with a burnt out coil that he wanted repaired so he dropped it off to Ashley and soon after the much needed re-cone/coil rebuild kit was ordered in from Digital Designs.
Just a quick note before I carry on, the most common way Sub-Woofer coils are burnt out is from the box sliding around a cars boot causing the Sub-Woofers cone/rubber to be pressed up against an object stopping the Sub-Woofer from its natural movement. Thus putting a lot of strain on the coils causing them to overheat and burning them out in the process.
The other two main causes for burnt coils are a clipped signal coming from the amplifier and mechanically overdriving the speaker.
Ok, now for the repair!
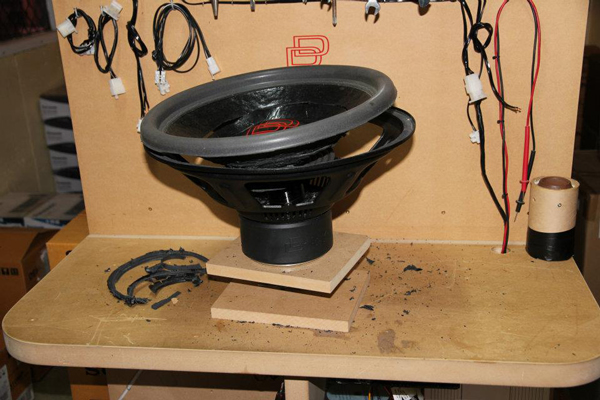
The first job was removing the old cone and coils, this looked like quite a bit of fun as it involved a lot of cutting and as sad as it is to cut up a Digital Designs Sub-Woofer I can’t help but enjoy destroying something beautiful as long as its for a good cause!
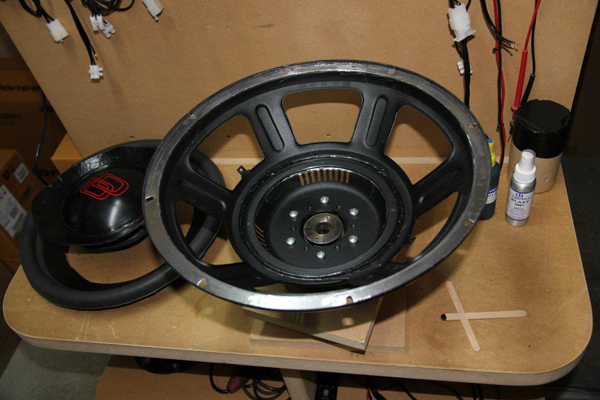
Once all the cutting and destroying was done it was time to start cleaning up the casing. Ashley must of spent about a good solid hour grinding away at the left over glue and plastic/rubber with a dremel, this might sound like a very easy job but it is anything but if you take into consideration that it is a very delicate job. What makes it so delicate is that not only do you want a clean surface for the glue to set on, you also want a flat surface so you wouldn’t want to get too keen with a grinder and make the surface all uneven.
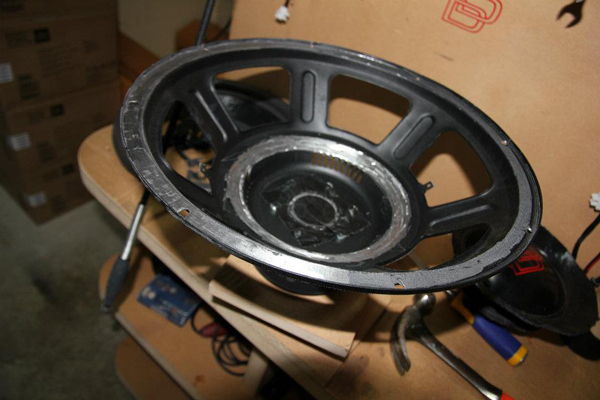
The next job on hand is placing and gluing the plastic ring that the Spider suspension is glued to. The placement of this plastic ring is very vital when it comes to this kind of repair as it dictates the placement of the Spider suspension, if this plastic spacer was glued to much to one side of the casing it could cause the coils to rub on the coil-pole making them burn out ruining your re-coiled/repaired Sub-Woofer.
Once the plastic ring in glued into place you can test fit the coils but before you test fit the coils some plastic mylar sheets must be placed inside the coils so it can be spaced evenly from the coil-pole. Making sure the coils are spaced evenly is as easy as adding or subtracting the mylar sheets one at a time but if you want this to be perfect it pays to take your time to do so.

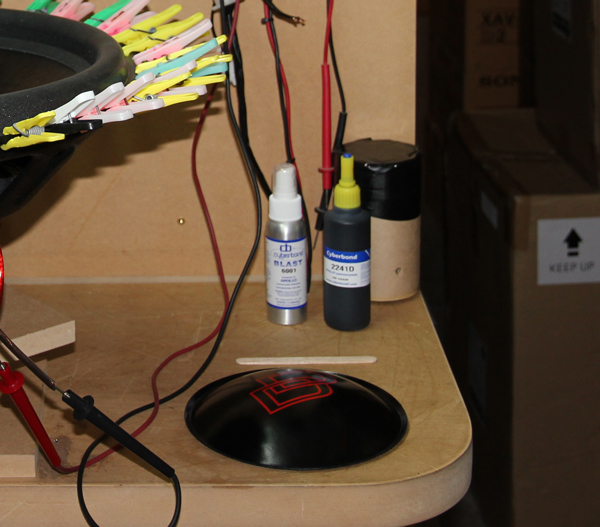
Now that the coils have been test fitted and perfectly spaced its now time to apply the glue to the Spider landing and also the surround landing. Ashley was saying that the adhesive is some pretty interesting glue and sounds almost like an industrial glue I used to use on aluminium when I was engineering, you have the resin (glue) in one bottle that you apply and then you spray it with a hardener kind of like a 2pac glue.
Since the glue goes off reasonably quick you have to make you fit the coils/cone pretty much straight after applying the glue and also making sure its firmly in place before spraying the hardener onto the glue because once the hardener is sprayed onto the glue it goes like concrete almost instantly.
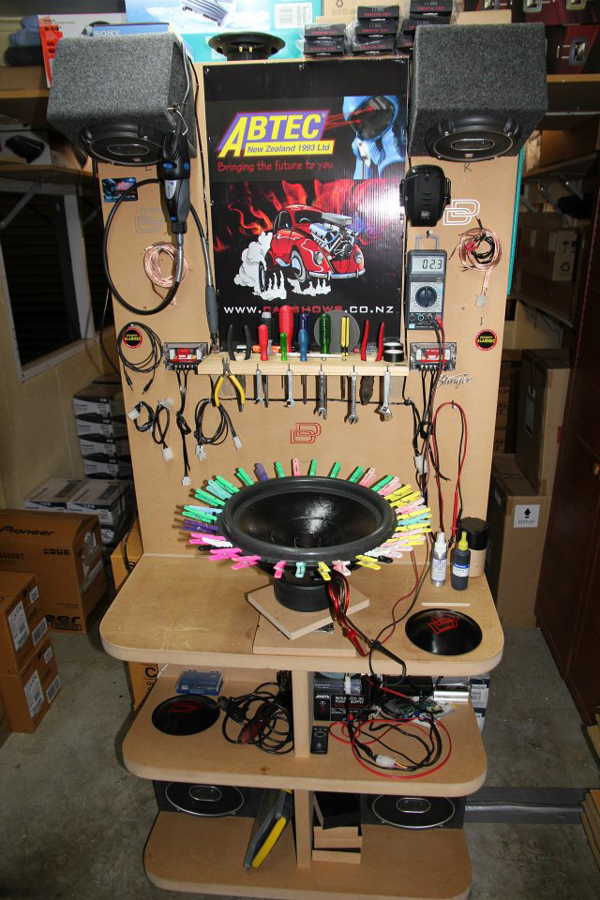
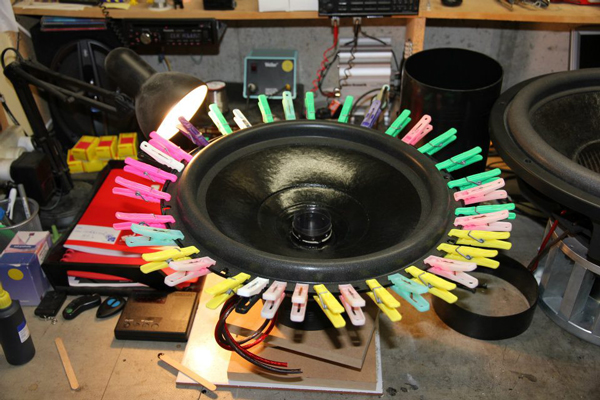
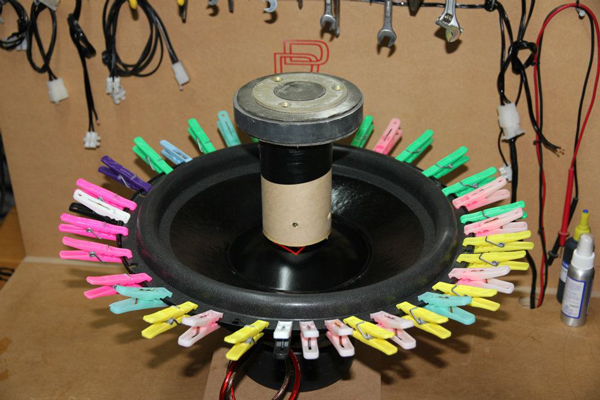
Another important factor with the glue setting quickly is to make sure the Spider landing and surround landing is held down firmly, to help with this Ashley used the supplied craft sticks to hold down the Spider suspension in place and pegs to hold the surround.
After the glue had completely set the plastic mylar sheets were removed, there now was one more job to do before Ashley could call it a day. This job was gluing the dust cap onto the cone, this job is the most basic of the lot but if you don’t have a good eye you could end up with a lop sided looking Sub-Woofer.
So the best way to make this job easy was to place the dust cap where you want it, double check its placement then lightly trace a line around it with a pencil. Once you have done this you would glue around the line, place the dust cap in place and use a relatively heavy item to hold it in place while you put one more bead of glue around the edge before spraying it with some of the hardener spray.
After two hours of letting the glue fully set the Digital Designs DD-1515-D2 was like new ready for its owner to run it in and from all the messages and comments on facebook the owner sounds over the moon with the result!
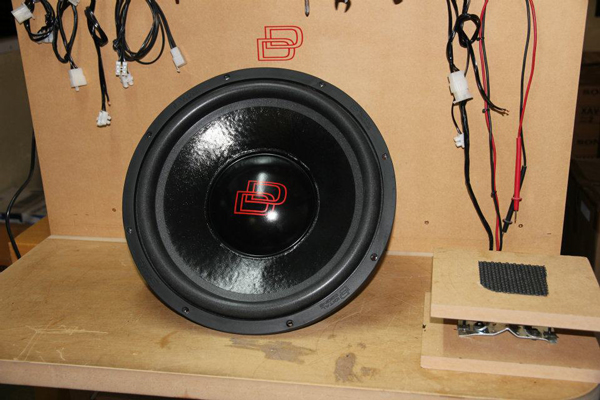
And just look at that finish, how could you not be happy!


